Hi and welcome to another tutorial in my Unity3D series!
This one will be about a subject greatly requested, Object Pooling.
Remember that those tutorials expects you to have some kind of programming experience.
So what is Object Pooling?
Pooling refers to the pattern of keeping a set of objects ready to use and reuse. This mean that instead of instantiating and destroying objects on demand you will already have a number of them on the ready, and when you no longer need them you just give them back to the pool, instead of destroying it.
Why would I do that?
Performance, really. While you might heard the phrase “premature optimization is the root of all evil” and think that optimization is beyond what a beginner tutorial should focus on, I think Pooling is a great and simple tool in helping deal with many problems you might find in game development.
Basically Pooling shines in an environment where you are trying to use a lot of short lived objects, such as bullets or special effects.
When instantiating a new object you are actually requiring the allocation of memory, which is a very slow process (in comparison with simple operations), and when destroying you are requesting the services of the Garbage Collector, a being of pure evil who does not care about your circumstances when doing it’s job.
The main problem of the Garbage Collector is that it does not know when it is a good time to run, since it is a slow process it waits until there is sufficient amount of objects waiting to be disposed of to collect, and that might happen at any time generating small hiccups during gameplay.
So when instantiating and destroying an object you are doing two very slow process, while technology have greatly improved and some games might not notice it. It is a good practice to take care of this issue as soon as possible, preventing it from generating problems as your project size increases.
Issues with Pooling
Object Pooling does come with it’s own pitfalls, it does complicates the process of requesting objects and disposing of them.
While before you might simple Instantiate a new object whenever needed, obtaining a completely new and shine object in the process, now you are actually reusing an object that already exists and as such, have to take care so it is in the condition you want before using it.
You might have noticed this problem in other games, in Dota2 some creeps might spawn with special effects still attached to it, or while having arrows stuck to them. This was probably caused by a Pooling system that did not clean the object correctly before reusing them.
Other games such as Ragnarok Online even have worse bugs to the point of having passive monsters respawn already attacking you, “remembering” their previous fight before dying.
Of course those issues just mean you need to take more care when using Pooling, a good system is mostly fail-safe and will hardly give problems once correctly set.
So how do I join on the Pool?
I will be using a modified script I obtained from a github (which you can check at the end of the tutorial) in order to give an example of a stable Pooling.
You can find the script in full at the end of explanation, at the spoiler box.
using System;
using System.Collections.Generic;
using UnityEngine;
using Object = UnityEngine.Object;

namespace Unitilities {

    public static class GameObjectPool {

        private const int DefaultSize = 10;

        //prefab to queue of inactives
        private static readonly Dictionary<GameObject, Queue<GameObject>> Pool = new Dictionary<GameObject, Queue<GameObject>>();
        //instance to prefab
        private static readonly Dictionary<GameObject, GameObject> Active = new Dictionary<GameObject, GameObject>();
In this example the GameObjectPool class can be used without the need of attaching it to any script, you can just create a GameObjectPool.cs file anywhere in your Asset folder, copy it’s content and use in any script that you include Unitilities.
If you have read my previous tutorial about Singleton, the concept might not be alien to you.
So first we have a constant DefaultSize with a value of 10, this one is used when creating the initial number of objects in the pool.
This might happen in two ways, by manually calling Warm without specifying a number of objects, or while trying to ask for objects that do not have a pool yet.
Then we have two Dictionaries, one for objects on standby on the pool and another for objects being currently used.
Having a way to track active objects bring two immediate advantages, one is, you have a way to parse through all objects being currently used.
Another is that you are able to differentiate between objects that are being used from a pool and objects that have been individually instantiated.
This may be useful or not depending on your project, and you might even omit this part on your own system.
Still in the Dictionary explanation, this system uses a clever trick in putting a Queue using a prefab as the Key. This mean that by giving a prefab to instantiate from you are immediately able to access a collection of objects ready to be used.
public static Queue<GameObject> Warm(GameObject prefab, int count = DefaultSize) {
    Queue<GameObject> queue;

    if (!Pool.TryGetValue(prefab, out queue)) {
        Pool.Add(prefab, queue = new Queue<GameObject>(count));
    }

    var stored = queue.Count;

    for (int i = 0; i < count - stored; i++) {
        var go = Object.Instantiate(prefab);
        go.SetActive(false);
        queue.Enqueue(go);
    }

    return queue;
}
Our first method is Warm, by calling it while providing a prefab you will instantiate a number of objects from that prefab and store them at the correct pool, ready to be used.
When called on a pool that already exists, it will just add a number of objects to it.
public static GameObject Get(GameObject prefab, Transform parent = null) {
    if (!prefab) {
        return null; //oops check
    }

    Queue<GameObject> queue;
    if (!Pool.TryGetValue(prefab, out queue)) {
        queue = Warm(prefab, DefaultSize);
    }

    GameObject go;
    if (queue.Count == 0 || !(go = queue.Dequeue())) { //check if go hasn't been Destroyed
        go = Object.Instantiate(prefab);
    }

    go.transform.SetParent(parent);
    go.SetActive(true);
    Active.Add(go, prefab);

    return go;
}
Our second method is Get, this one allows you to get an object from the pool when provided with a prefab, you might also provide a transform to parent it from when called. If there is no objects left in the pool to be used it will Instantiate a new one.
This is your way of getting an object from the pool.
public static void Put(GameObject go) {
    if (!go) {
        return; //oops check
    }

    GameObject prefab;
    if (Active.TryGetValue(go, out prefab)) {
        go.SetActive(false);
        go.transform.SetParent(null);
        go.transform.localPosition = Vector3.zero;
        Active.Remove(go);

        foreach (var mono in go.GetComponents<MonoBehaviour>()) {
            IDisposable disposable = mono as IDisposable;
            if (disposable != null) {
                disposable.Dispose();
            } //try dispose
        }

        Pool[prefab].Enqueue(go);
    } else {
        Object.Destroy(go);
    }
}
Our third method is Put, at this one you provide the object you want to store at the pool, notice that if the object did not come from a pool initially it will just be destroyed, regardless if a pool of it’s type exists at all.
Please remember that the parameter is the object you want to store, not the prefab it originated from.
public static void Clear() {
    foreach (var prefab in Pool.Keys) {
        Clear(prefab);
    }

    Pool.Clear();
}

public static void Clear(GameObject prefab) {
    if (!prefab) {
        return; //oops check
    }

    Queue<GameObject> queue;
    if (!Pool.TryGetValue(prefab, out queue)) {
        return;
    }

    foreach (var go in queue) {
        Object.Destroy(go);
    }

    queue.Clear();
}
Lastly we have two methods called Clear, while called without parameters it will simply undo all collections of objects, notice that this does not actually destroy the objects in the pool.
If you do provide a parameter, it will instead only clear a pool of objects originating from the given prefab.
The full script is provided now:
using System;
using System.Collections.Generic;
using UnityEngine;
using Object = UnityEngine.Object;

namespace Unitilities {

    public static class GameObjectPool {
        private const int DefaultSize = 10;

        //prefab to queue of inactives
        private static readonly Dictionary<GameObject, Queue<GameObject>> Pool = new Dictionary<GameObject, Queue<GameObject>>();
        //instance to prefab
        private static readonly Dictionary<GameObject, GameObject> Active = new Dictionary<GameObject, GameObject>();

        public static Queue<GameObject> Warm(GameObject prefab, int count = DefaultSize) {
            Queue<GameObject> queue;

            if (!Pool.TryGetValue(prefab, out queue)) {
                Pool.Add(prefab, queue = new Queue<GameObject>(count));
            }

            var stored = queue.Count;

            for (int i = 0; i < count - stored; i++) {
                var go = Object.Instantiate(prefab);
                go.SetActive(false);
                queue.Enqueue(go);
            }

            return queue;
        }

        public static GameObject Get(GameObject prefab, Transform parent = null) {
            if (!prefab) {
                return null; //oops check
            }

            Queue<GameObject> queue;
            if (!Pool.TryGetValue(prefab, out queue)) {
                queue = Warm(prefab, DefaultSize);
            }

            GameObject go;
            if (queue.Count == 0 || !(go = queue.Dequeue())) { //check if go hasn't been Destroyed
                go = Object.Instantiate(prefab);
            }

            go.transform.SetParent(parent);
            go.SetActive(true);
            Active.Add(go, prefab);

            return go;
        }

        public static void Put(GameObject go) {
            if (!go) {
                return; //oops check
            }

            GameObject prefab;
            if (Active.TryGetValue(go, out prefab)) {
                go.SetActive(false);
                go.transform.SetParent(null);
                go.transform.localPosition = Vector3.zero;
                Active.Remove(go);

                foreach (var mono in go.GetComponents<MonoBehaviour>()) {
                    IDisposable disposable = mono as IDisposable;
                    if (disposable != null) {
                        disposable.Dispose();
                    } //try dispose
                }

                Pool[prefab].Enqueue(go);
            } else {
                Object.Destroy(go);
            }
        }
        //replacement for Destroy
        //public static void Put(GameObject go, float delay) => MEC.Timing.CallDelayed(delay, () => Put(go));

        public static void Clear() {
            foreach (var prefab in Pool.Keys) {
                Clear(prefab);
            }

            Pool.Clear();
        }

        public static void Clear(GameObject prefab) {
            if (!prefab) {
                return; //oops check
            }

            Queue<GameObject> queue;
            if (!Pool.TryGetValue(prefab, out queue)) {
                return;
            }

            foreach (var go in queue) {
                Object.Destroy(go);
            }

            queue.Clear();
        }
    }
}
Examples of Pooling
I’ve made a small proof of concept project using Unity3D 2018.2.8f1, inspired by Magical Miracle Mira from sheepytina.

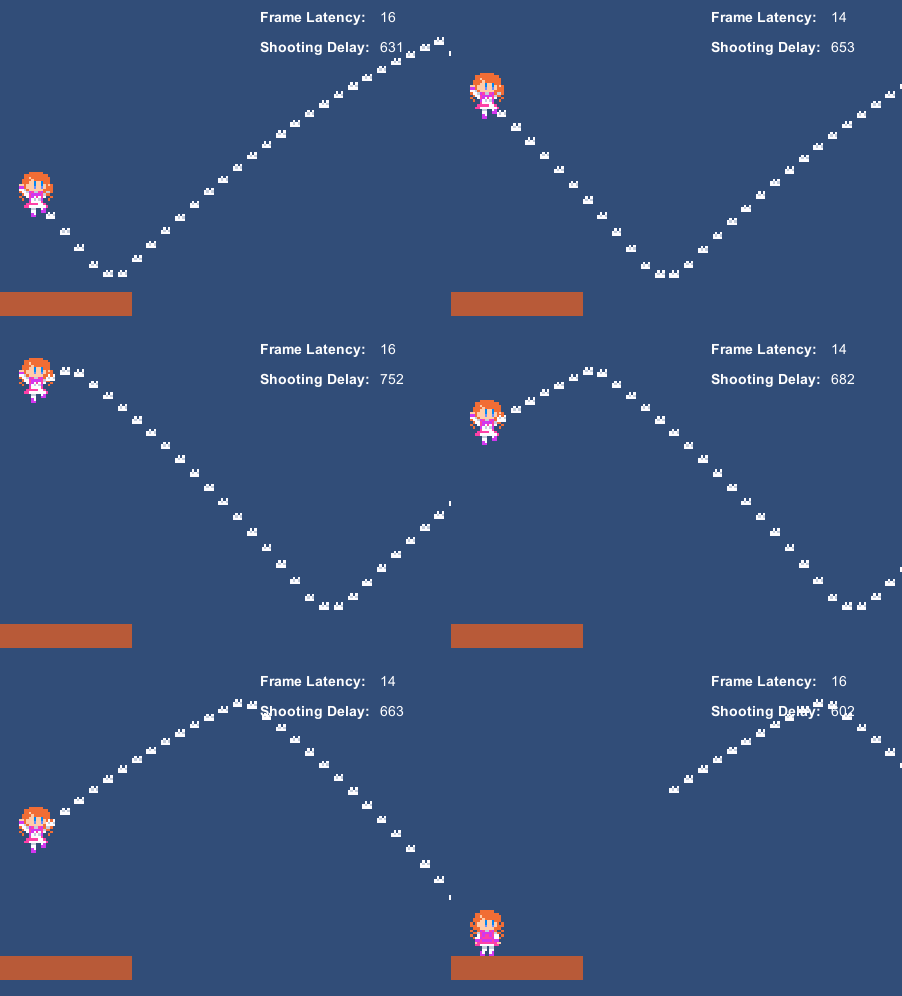
The most important information is Shooting Delay, which is the amount of ticks it takes to get a new bullet ready to shoot.
First I will shoot some bullets without using a pool, I will just instantiate and destroy when needed:

The first bullet have all the overhead of Unity3D initializing the object since it has never existed before, so caching it’s default data, loading sprites, etc, so the time is absurdly high. You can lower this by loading a bullet at the start and destroying it right after.
The times were: 8406, 1469, 1338, 2071, 1276, 1699, 1433
Average of: 1547.7 ticks
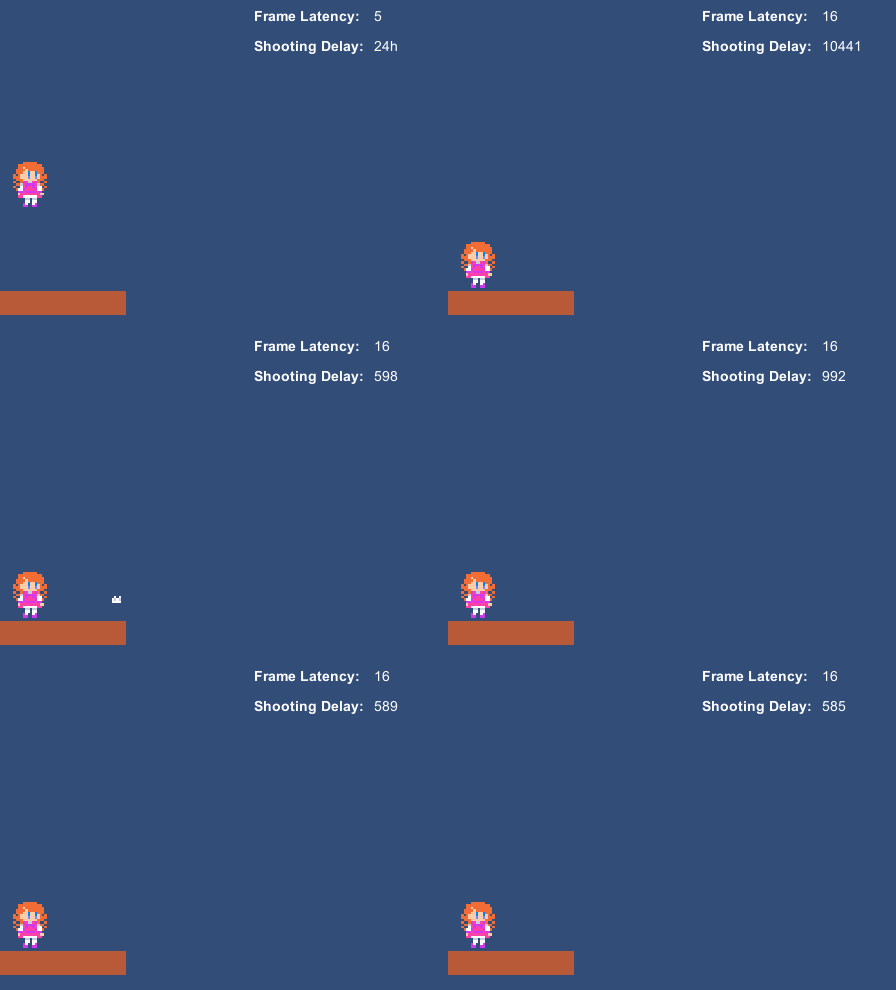
Now I will use an object pool for the bullets:

In this case the first bullet still have the whole overhead, while I am indeed using the pool system I initialize the bullets deactivated, which does not prompt Unity3D to load it’s data until the first one is activated.
The times were: 10441, 615, 598, 992, 608, 589, 585
Average of: 664.5 ticks
You can see that is roughly 40% of the time needed instead! And this is only in a very simple game where the only thing you can do is move, jump and shoot.
The difference will absolutely increase as the project grows in size and complexity, reaping more benefits from a pool system.
You can download the project I used to test here.
Food for thought
The script provided is just one of innumerable ways to pool objects in your game, try to modify it or create your own to fit your needs!
As an example, in my game I have an Interface for objects who are pooled, this interface provides a Spawn and Unspawn method that are called when objects are put into the pool and retrieved from it.
For an exercise, how about trying to get rid of the initial hiccup when shooting the bullets in the provided project?
In the end?
There is no end! Reuse your objects and increase the quality of your game!
Special Thanks
Ravarix for providing the original script.
I hope this tutorial was of help to you, and if possible a donation of 1$ may be of great help on aiding the development of future tutorials:

https://www.patreon.com/TinyBirdGames
Thank you very much!
